Wednesday, June 08, 2011

How to reset or recover CMOS or BIOS settings to factory default settings

All motherboard manufacturers provide you option of clearing CMOS settings to factory default settings by changing the jumper settings. Motherboards have three pin jumper settings block.
Motherboard manufacturers have their CMOS jumper placed at different locations on their motherboard. Most of the motherboard manufacturers have their CMOS jumper settings block placed near to the battery.

Refer to the motherboard user manual in case if you are not sure where the CMOS jumper is placed.

Reasons to reset the CMOS settings:
  • If you want to make changes in BIOS settings and you do not remember the BIOS supervisor password.
  • If you are not able to boot windows after making wrong changes in BIOS setting.
  • Playing high resolution games without AGP card which changes your screen resolution or colors or monitor goes blank.
Procedure:
The image above shows the jumper with three pins in which the jumper is already placed on two pins looking from the left. Jumper is used to short the two pins. Look for the name CMOS or CLR_CMOS or JP<number> or JUMPER PASSWORD (in old motherboards) near to CMOS battery in the motherboard

Changing jumper in CMOS setting block varies depending on the manufacturer of the motherboard. For example: For Example in Intel motherboard to clear the BIOS setting, place the jumper on 2nd and 3rd pin and hold the CPU power button for few seconds. Turn off the computer and again put the jumper back to 1st and 2nd pin which is considered as normal and switch on the computer to reset the BIOS setting back to factory default.

Intel motherboard CMOS jumper settings:
  • Jumper placed on pins 1st and 2nd  (as shown in above jumper image) is considered as normal which is default settings.
  • Jumper placed on pins 2nd and 3rd is considered as clearing the BIOS settings.  This happens after POST (Power on Self Test).
  • If the jumper is removed meaning all three pins are free, then BIOS data is recovered if something goes wrong when updating the BIOS.
 Gigabyte motherboard CMOS jumper settings:
  • Jumper placed on pins 1st and 2nd (as shown in above jumper image) is considered as clearing BIOS settings.
  • Jumper placed on pins 2nd and 3rd is considered as normal which is default settings.
  • If the jumper is removed meaning all three pins are free, then BIOS data is recovered if something goes wrong when updating the BIOS.
Some motherboards manufacturers will just name CMOS settings block as JP with number. Look in the motherboard for block diagram of the particular jumper along with the number. This block diagram represents the CMOS settings block. All the motherboard will have block diagram of the CMOS jumper settings block.

For Example: If CMOS settings block is named as JP3, then look in the motherboard for block diagram of JP3 or just search for name CMOS in the motherboard which shows the block diagram of the CMOS settings block.

Tuesday, June 07, 2011

Installing windows and other application in less than 30 minutes

Installing windows and other applications will take more than less or more than an hour depending on the speed of your computer. But with Norton Ghost you can install windows operating system along with other applications in less than half an hour. Norton Ghost creates an image of your entire computer (operating system, hardware drivers, installed applications, files and folders created and stored by user). In case your operating system is having serious problem or crashed, you can install windows and applications from the image created by Norton Ghost without any user intervention. You can create Norton Ghost image file for your computer either using GUI (Graphical User Interface) or DOS window.

TO CREATE IMAGE FILE:
Click on BACKUP to open Backup Wizard
Click NEXT to select the drive or partition which you want to create backup image and the destination where you want to place the image file.
Click NEXT to give the path and file name to the image file
After giving the file name and path where to store the file, click NEXT to go to ADVANCED SETTINGS screen.
Do not make any changes in the settings. Click NEXT to go to next screen
Click NEXT to go to final screen
Click on RUN NOW to start creating image file of your entire drive or only the partition.

TO RESTORE FROM IMAGE FILE:
 Click on RESTORE to go to Restore Wizard
Click on NEXT to select the image file
Click NEXT to restore from the image file

Sunday, June 05, 2011

How to troubleshoot when you have problem accessing internet

  • Check for installed ethernet card driver. Hold " WINDOWS " key and press " R " to open RUN window. Type " devmgmt.msc " without double quotes and press ENTER key to open DEVICE MANAGER window.  
  • Go to NETWORK ADAPTERS in the list and click on " + " symbol on the left of the heading. Now you should be able to see a list under NETWORK ADAPTERS heading. If you do not see any list in NETWORK ADAPTERS list then the ethernet card driver is not installed. If the ethernet card driver is corrupt or not properly installed, you see a yellow color question mark symbol or exclamatory symbol in the list then reinstalling the driver will fix the problem. Still if you have the problem, replace the ethernet card. Most of the recent motherboard comes with integrated LAN port. If you on-board LAN port has problem then install new PCI ETHERNET CARD which can be fixed on the PCI slot of your motherboard. 
  • Check for proper connectivity of CAT5 network cable between your computer's ethernet card and router or modem.
  • Check if your LOCAL AREA CONNECTION is disabled. Hold " WINDOWS " key and press " R " to open RUN window. Type " ncpa.cpl " without double quotes and press ENTER key to open NETWORK CONNECTIONS window. If disabled, right-click on LOCAL AREA CONNECTION and click on " ENABLE " to enable network connection.
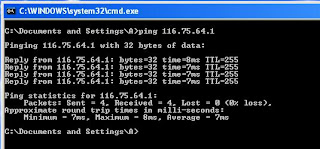
  • Check for the connectivity between your computer and router or modem using PING command. Hold " WINDOWS " key and press " R " to open RUN window. Type " cmd " without double quotes and press ENTER key to open DOS window. In the command prompt type " ping <IP address> " without double quotes and press ENTER key. Replace <IP address> with the IP address of router or modem. You should get reply from router or modem. If not, there should be either problem with CAT5 cable or ethernet card/driver or with your router/modem or with your internet service provider.
  • If you are able to ping router or modem and not able to access internet then there should be problem with either your network connection setting such as IP address, Default Gateway or DNS servers or with your internet service provider. Contact your service provider for IP address, Default Gateway and DNS Servers. If your IP address is assigned automatically (DHCP) there is no need to manually assign IP address.

Three keystrokes to change or remove administrator or user password through DOS command prompt

It is very easy to remove or change the password for administrator or user with administrator rights through command prompt provided you have administrator access to the computer. Once logged in as administrator in windows, you can change administrator password or create user with or without administrator access rights. Usually to change the administrator or user password, you have to go to START - SETTINGS - CONTROL PANEL and double-click on USER ACCOUNTS to change the password. If you are using only keyboard then hold the " WINDOWS " key and press " R " to open RUN window and type " nusrmgr.cpl " without double quotes to open USER ACCOUNTS window to change the password.

The procedure to to change the password through DOS command prompt is:
  • Hold " WINDOWS " key and press "R" to open RUN window and type " cmd " without double quotes to open DOS window.
  • Type " net user " without double quotes at command prompt and press ENTER key to show the list of users.
  •  Type " net user <username> * " without double quotes and press ENTER key to enter new password. Replace <username> with actual user name to whom the password has the be changed. In the image below "A" is the user name to whom password is changed.

Friday, June 03, 2011

Installing SATA (Serial Advanced Technology Attachment) hard disk driver without floppy during windows XP setup

Many might have encountered the problem SATA hard disk not detected during Windows XP installation. Usually driver for SATA hard disk comes with floppy provided by motherboard manufacturer whether it is desktop or laptop. If you have a floppy drive and a floppy with SATA AHCI driver in it, then installing Windows XP is very easy. During installation you have to press F6 to install SATA AHCI driver by inserting floppy containing SATA driver. If there is no fixed floppy drive then use USB floppy drive to install driver. Now you should be able to see the driver list. Select the AHCI driver and press ENTER key to continue installing Windows XP.

Installing driver for SATA hard disk without floppy containing SATA AHCI driver and floppy drive is very easy provided you follow these simple steps.
  • You have to download SATA driver from motherboard manufacturer website. If laptop, then download SATA driver from the laptop brand website.
  • Create a folder named WindowsXP in any partition and copy all files and folders from your original Windows XP operating system CD/DVD to the newly created folder.
  • Click Here to download free nlite software. Make sure you have .NET Framework 2.0 SP1 or more is installed in you computer before installing nlite. Click here to download .NET Framework 2.0 SP1 for x86 (32 bit environment) or Click here to download .NET Framework 2.0 SP1 for x64 (64 Bit environment) . Nlite software is used for integrating drivers, service packs, components, programs with Windows XP or any other windows operating system. With nlite you can either directly burn the operating system along with integrated drivers, service packs, components, programs to the CD/DVD or you can create image file if you want to burn it to CD/DVD later.
  • Click here to see the procedure of integrating SATA AHCI driver with windows using nlite software.
  • Once you create operating system CD/DVD with integrated SATA driver using nlite software, installation of Windows XP is very easy. Install Windows XP with newly nlite created bootable CD/DVD. SATA AHCI driver will be automatically installed during operating system installation.

Google Analytics